Dagster + Meltano: A complete open-source ELT solution for the modern data stack
• Josh LloydThere are dozens of extract, transform, load (ELT) tools on the market (yes we call it ELT not ETL, and for good reasons). There are obvious pros and cons to each. So, when we, the Widen Data Team, began looking for the best tools for this job we had specific criteria in mind to help us make the decision.
The tools we selected are relative newcomers to the data world but both have picked up a lot of traction in a short time. Meltano is an open-source ELT tool built on the Singer Specification designed specifically to be self-hosted, CLI-first, debuggable, and extensible. Dagster is an open-source data orchestrator for machine learning, analytics, and ETL. While it is in the same category as Airflow, to describe it as a competitor is a bit narrow-minded because it was built from the ground up for the purpose of managing and keeping track of the data as it flows through the pipeline.
The combination of these two technologies is relatively unique. We are not the first, but certainly one of the few and probably the only (so far) to write an article on why and how to combine these two.
If you want to jump straight to the example and code, click here.
Why Meltano
Our frustration with our existing low-code ELT tool, which will remain unnamed, centered around high cost, poor traceability, poor logging, and no revision control. Lowering costs is always a benefit in an enterprise environment since budgets and price pressure have disrupted more than one data team’s progress. Extraction and loading is such a commonplace activity these days that it just doesn’t make sense to pay premium prices for such mundane tasks. In addition, given recent team expansion, we were also no longer afraid of coding solutions from scratch in Python on AWS’s platform. Dbt was also our preferred transformation tool based on the team’s prior experience. Dbt is a sql + jinja tool that helps perform transformations inside your data warehouse.
As a result, we began looking for open-source ELT tools. Simple google searches led us quickly to Meltano. To be clear, Meltano is actually an orchestration tool for Singer taps and targets with decent integrations to dbt and Airflow helping complete the ELT picture. It matched all of our criteria. We were immediately intrigued!
We took it for a test drive and were astounded to actually get the simplest pipeline running from our local machine in a matter of a few hours! We will show how easy this is later in the article (it takes mere minutes to complete). We were in love, but the real test was to see if it could handle our unique extraction issue that most other paid ELT solutions were not able to handle. This was the only thing that Meltano could not handle … by itself.
Why Dagster
If Meltano is an orchestration tool that includes Airflow, you might ask why we would need to involve another orchestration tool? The answer is that the Airflow integration in Meltano is very much under the hood and doesn’t allow for much more than scheduling pipeline runs.
Our challenge was the fact that we have a monolith application that was designed with a multi-tenant database on the backend. In other words, each of our hundreds of customers have a MySQL schema/database with their name on it, with the exact same design. These hundreds of customers are necessarily spread across dozens of AWS RDS instances. On top of that, this list of customers could and does grow on any given day which means the number of databases and instances either increases or decreases on a regular basis.
There are two options a team has for building a pipeline that can handle this scenario.
- Set up a separate pipeline for each RDS instance or database.
- Loop through a list of RDS instance connections and databases, obviously parallelizing the process where possible.
Option one really isn’t a good solution. It doesn’t scale and it’s labor intensive to create and maintain nearly identical pipelines for each RDS connection. Option two is where an orchestration tool external to Meltano is handy.
Why Dagster with Meltano
To be fair, we could have chosen Airflow since it’s already a part of Meltano, but the reality is that there is no particular advantage to do this because the two instances of Airflow would operate independently of each other. So we were free to select the orchestration tool that best fit our criteria.
As of the time of our research, there were three open-source options: Airflow, Prefect, and Dagster. Any one of these can do the job. Airflow is the juggernaut in this space, but Prefect and Dagster were born out of a desire for something a little more applicable to modern challenges. When comparing Prefect and Dagster, there was a lot to like about both and we had a hard time choosing between the two. Ultimately we chose Dagster because we were inspired by their approach to designing a data-focused orchestrator as described in this article. Rather than just claiming to compete with and be better than Airflow they approach it from a more holistic, customer-centric approach. We believe this will serve us better in the long-run with Dagster’s design methodology being a little less reactive and more proactive.
How we combine them
Ultimately, the way we designed our solution uses Dagster as a wrapper around Meltano which is itself a wrapper around Singer and dbt. We do not use the Meltano UI, instead we only use Dagster’s Dagit UI for all monitoring and scheduling tasks. We also combine Dagster’s persistent database storage in the same instance with Meltano’s database storage. This helps decrease costs in production.
What we build in this post
We will now demonstrate how to develop a simple Dagster pipeline that will run a Meltano pipeline. We will use one of the open-source taps that we have built — tap-rest-api — to extract USGS Earthquake Events data from a public api (no authentication required). We will replicate this data to a JSON file which is not a typical use case, but this tap and target, as they are called in the Singer ecosystem, can be swapped out for any tap or target you desire. Thanks to Meltano, configuration of any taps or targets always follow the same principles we will follow here.
This post will only describe how to get this up and running on a single machine without the use of Docker. Other forthcoming posts will show how to do some of the intricacies related to our setup like:
- Setting up a local Docker configuration of Dagster
- Designing your docker-configuration to deploy to AWS ECS Fargate
- Updating the selected streams dynamically for each
meltano eltrun - Iterating through a list of DB connections with Dynamic Solids in Dagster
- Running dbt from a Dagster pipeline
- Etc.
You can view or clone the example we show here from https://github.com/Widen/dagster-meltano-example.
We develop primarily with macOS, so when you see CLI commands they will be using macOS terminal commands. That being said, each one of them should have their analog in other operating systems.
We will also be using pyenv and Python version 3.9.4.
Meltano setup
Set up environment
After setting up a git repository and navigating to its root directory in a terminal, it’s time to set up your environment.
pyenv virtualenv dagster-meltano 3.9.4
This uses pyenv to set up a virtual environment named
dagster-meltano
and configures it to use python version 3.9.4. Note: you may have to install Python 3.9.4
prior to running this command with pyenv install 3.9.4.
Install and initialize Meltano
Next, we need to install Meltano:
pip install meltano
Next, we initialize the meltano project into a sub-directory:
meltano init meltano
You can change the name of the meltano project/directory to whatever you want. We chose meltano for the purpose of explicitly showing where Meltano assets will reside. In the terminal, you should see a stream of output including Project meltano has been created.. You should also see the directory named in the command appear with a number of files and directories within it.
Install tap
The next step is to add an extractor, or a Singer tap, which is the code module that pulls data from your desired source (e.g., a database, or an API) and feeds it to stdout. stdout acts as the middle layer or buffer that the loader will read from in order to load that data to the desired destination.
We will add Widen’s tap-rest-api as we described above, but you can swap this tap out with whatever tap you want. The same goes for the loader or Singer target. Meltano maintains an almost comprehensive list of taps and targets to choose from called MeltanoHub. There are several hundred to choose from, most are built and or maintained by the open-source community and therefore are in various states of functionality. In our experience, we have found 75% of the taps we need work right off the shelf.
Meltano provides more than one way to add taps and targets. We will use the command line first, but show you how to edit it after the fact. Ultimately, all the configuration ends up in the meltano.yml file found in the meltano directory. From the command line run:
cd meltano
meltano add --custom extractor tap-rest-api
This command might change depending on the exact tap you’re trying to install and the workflow might be different accordingly. Assuming you are installing this precise tap, you should receive a series of prompts in the command line. You’re best bet is to accept the defaults except for the pip_url in this case which should be:
git+https://github.com/Widen/tap-rest-api.git
This will install the tap using git rather than pip.
For capabilities enter state,catalog,discover. This determines which meltano commands will be enabled for this particular tap.
For settings enter nothing. We find the CLI method of configuring the settings to be onerous compared to editing the meltano.yml file because the settings can be quite complex depending on the tap. This especially applies to our tap-rest-api.
Once you hit enter, you’ll see a bunch of output but should finally result in Installed extractor ‘tap-rest-api’
Install target
Now we’ll install the loader or Singer target. In this case, we’ll use the target-jsonl which will read stdout and produce a valid json file with the data extracted by the tap. This target is largely only used for testing purposes, so you can swap this out as desired. Since this target is one of Meltano’s official loaders the configuration and installation process is even quicker.
meltano add loader target-jsonl
You will see some output, but it should finally result in Installed loader ‘target-jsonl’
Configure tap and target
Now let’s take a look at the dagster.yml file and finish the configuration. Your file should look something like this:
version: 1
send_anonymous_usage_stats: true
project_id: cb094cec-d74a-4a8b-a868-ce214fda75be
plugins:
  extractors:
  - name: tap-rest-api
    namespace: tap_rest_api
    pip_url: git+https://github.com/Widen/tap-rest-api.git
    executable: tap-rest-api
    capabilities:
    - state
    - catalog
    - discover
  loaders:
  - name: target-jsonl
    variant: andyh1203
    pip_url: target-jsonl
If you want to turn off the anonymous usage tracking, change the line to false and delete the project_id. You’ll notice a section for the extractor and the loader we installed.
You can actually change the name of the extractor to whatever you want. This will require that you use the updated name in Meltano CLI commands. We will leave it as is for simplicity, though this is useful when you use the same tap multiple times with different settings.
We need to finish configuring the settings for the tap-rest-api. This tap allows you to configure a typical python requests call. So many of the settings will reflect the same parameters of that python class. For our demo, we will add the following lines just under the tap-rest-api at the same level as the capabilities section and before the loaders line:
config:
  api_url: https://earthquake.usgs.gov/fdsnws
  streams_config:
    - name: us_earthquakes
      path: /event/1/query
      params:
        format: geojson
        starttime: "2014-01-01"
        endtime: "2014-01-02"
        minmagnitude: 1
      primary_keys:
        - id
      records_path: "$.features[*]"
select:
- '*.*'
Everything under config here sets up the python request. You can refer to the tap documentation for a better understanding of each field. The select section of this yml snippet determines which streams in the table are actually enabled. Streams roughly map to a table in a database or one API query path. There is a particular selection syntax that you can read more about here. For now, all you need to know is that this particular syntax enables all streams within this tap, which, in this case, is only one anyway.
No configuration for the target is needed except to create an empty directory with the following name and location: .\meltano\output. Without this, the target will give an error because it won’t find the place to put the output json file. We recommend you add this directory to your .\meltano\.gitignore file.
Run the Meltano pipeline
Now it’s time to test the pipeline. Enter the following command into the terminal:
meltano elt tap-rest-api target-jsonl --job_id=earthquakes
This command tells Meltano which combination of tap and target we want to use together, in this case we only have one valid combination. The job_id option is used as an identifier for this particular pipeline. It’s not required, but generally a good habit to include in order to prevent duplicate pipelines from running at the same time.
When run successfully, this should output logs for the pipeline and end with the lines
Extract & load complete! and Transformation skipped.
Congrats! You just ran your first Meltano/Singer pipeline. Now we’re ready to introduce Dagster.
Dagster setup
Install Dagster
Dagster is installed in a modular way based on your needs. The core package is called dagster, the ui is a package named dagit. Both are installable via pip. We will also need a plugin named dagster_shell which will be the mechanism through which we run Meltano shell commands in Dagster: \
pip install dagster dagit dagster-shell
Implement a Dagster pipeline
Let’s create a directory in the root of our project for our first and all future Dagster pipelines:
cd ..
mkdir dagster_pipelines
Then we’ll create a python file for the pipeline in that directory through whatever means you prefer. In that file, we’ll place the following code:
import os
from dagster import solid, pipeline, Failure
from dagster_shell.utils import execute


@solid
def run_shell_command(context, shell_command: str, env=None):
    """Generic solid for running shell commands.

    Args:
        shell_command (str): The shell command to execute
        env (Dict[str, str], optional): Environment dictionary to pass to ``subprocess.Popen``.
    Returns:
        str: The combined stdout/stderr output of running the shell command.
    """

    if env is None:
        env = {}
    elif not isinstance(env, dict):
        raise Failure(description=f"Shell command execution failed with non-conforming env dict: {env}")

    # meltano needs the `PATH` env var
    env_merged = {**os.environ.copy(), **env} if env else os.environ.copy()

    output, return_code = execute(
        shell_command=shell_command,
        log=context.log,
        output_logging="STREAM",
        env=env_merged,
        cwd=os.path.join(os.getcwd(), 'meltano')  # replace `meltano` with the name of the meltano dir if different
    )

    if return_code:
        raise Failure(description="Shell command execution failed with output: {output}".format(output=output))

    return output


@solid
def meltano_earthquakes_elt_cmd() -> str:
    """Generates a meltano elt command for the earthquakes pipeline."""
    return "meltano elt tap-rest-api target-jsonl --job_id=earthquakes"


@pipeline
def earthquakes_pipeline():
    run_shell_command(meltano_earthquakes_elt_cmd())
You’ll see in this code that we’ve created two solids and a pipeline each designated with the appropriate Python decorator. You can think of solids as a step in the DAG, though these solids can be arbitrarily complex and long (not recommended). The pipeline is a decorated function that pieces together all the solids into a workflow or DAG.
The first solid run_shell_command is the solid we use to, well, run shell commands within the Dagster environment. Particularly for us, all Meltano commands will use this solid.
The second solid is as simple as solids can get. In fact, you could argue that this is entirely unnecessary, and it is. We only did it this way to demonstrate the generation of the DAG in Dagster. A two node directed acyclic graph (DAG).
There are any number of ways to refactor this code to make it more usable, but we won’t do that until the next blog post.
Run a Dagster pipeline
Now we’re going to see how this looks in the dagit UI. Enter the following into the terminal while in the project root directory:
dagit -f dagster_pipelines/earthquakes.py
This will spit out a bit of output, but what you care about is the link to http://127.0.0.1:3000. Click on that and it will open the UI in a web browser. It looks something like this:
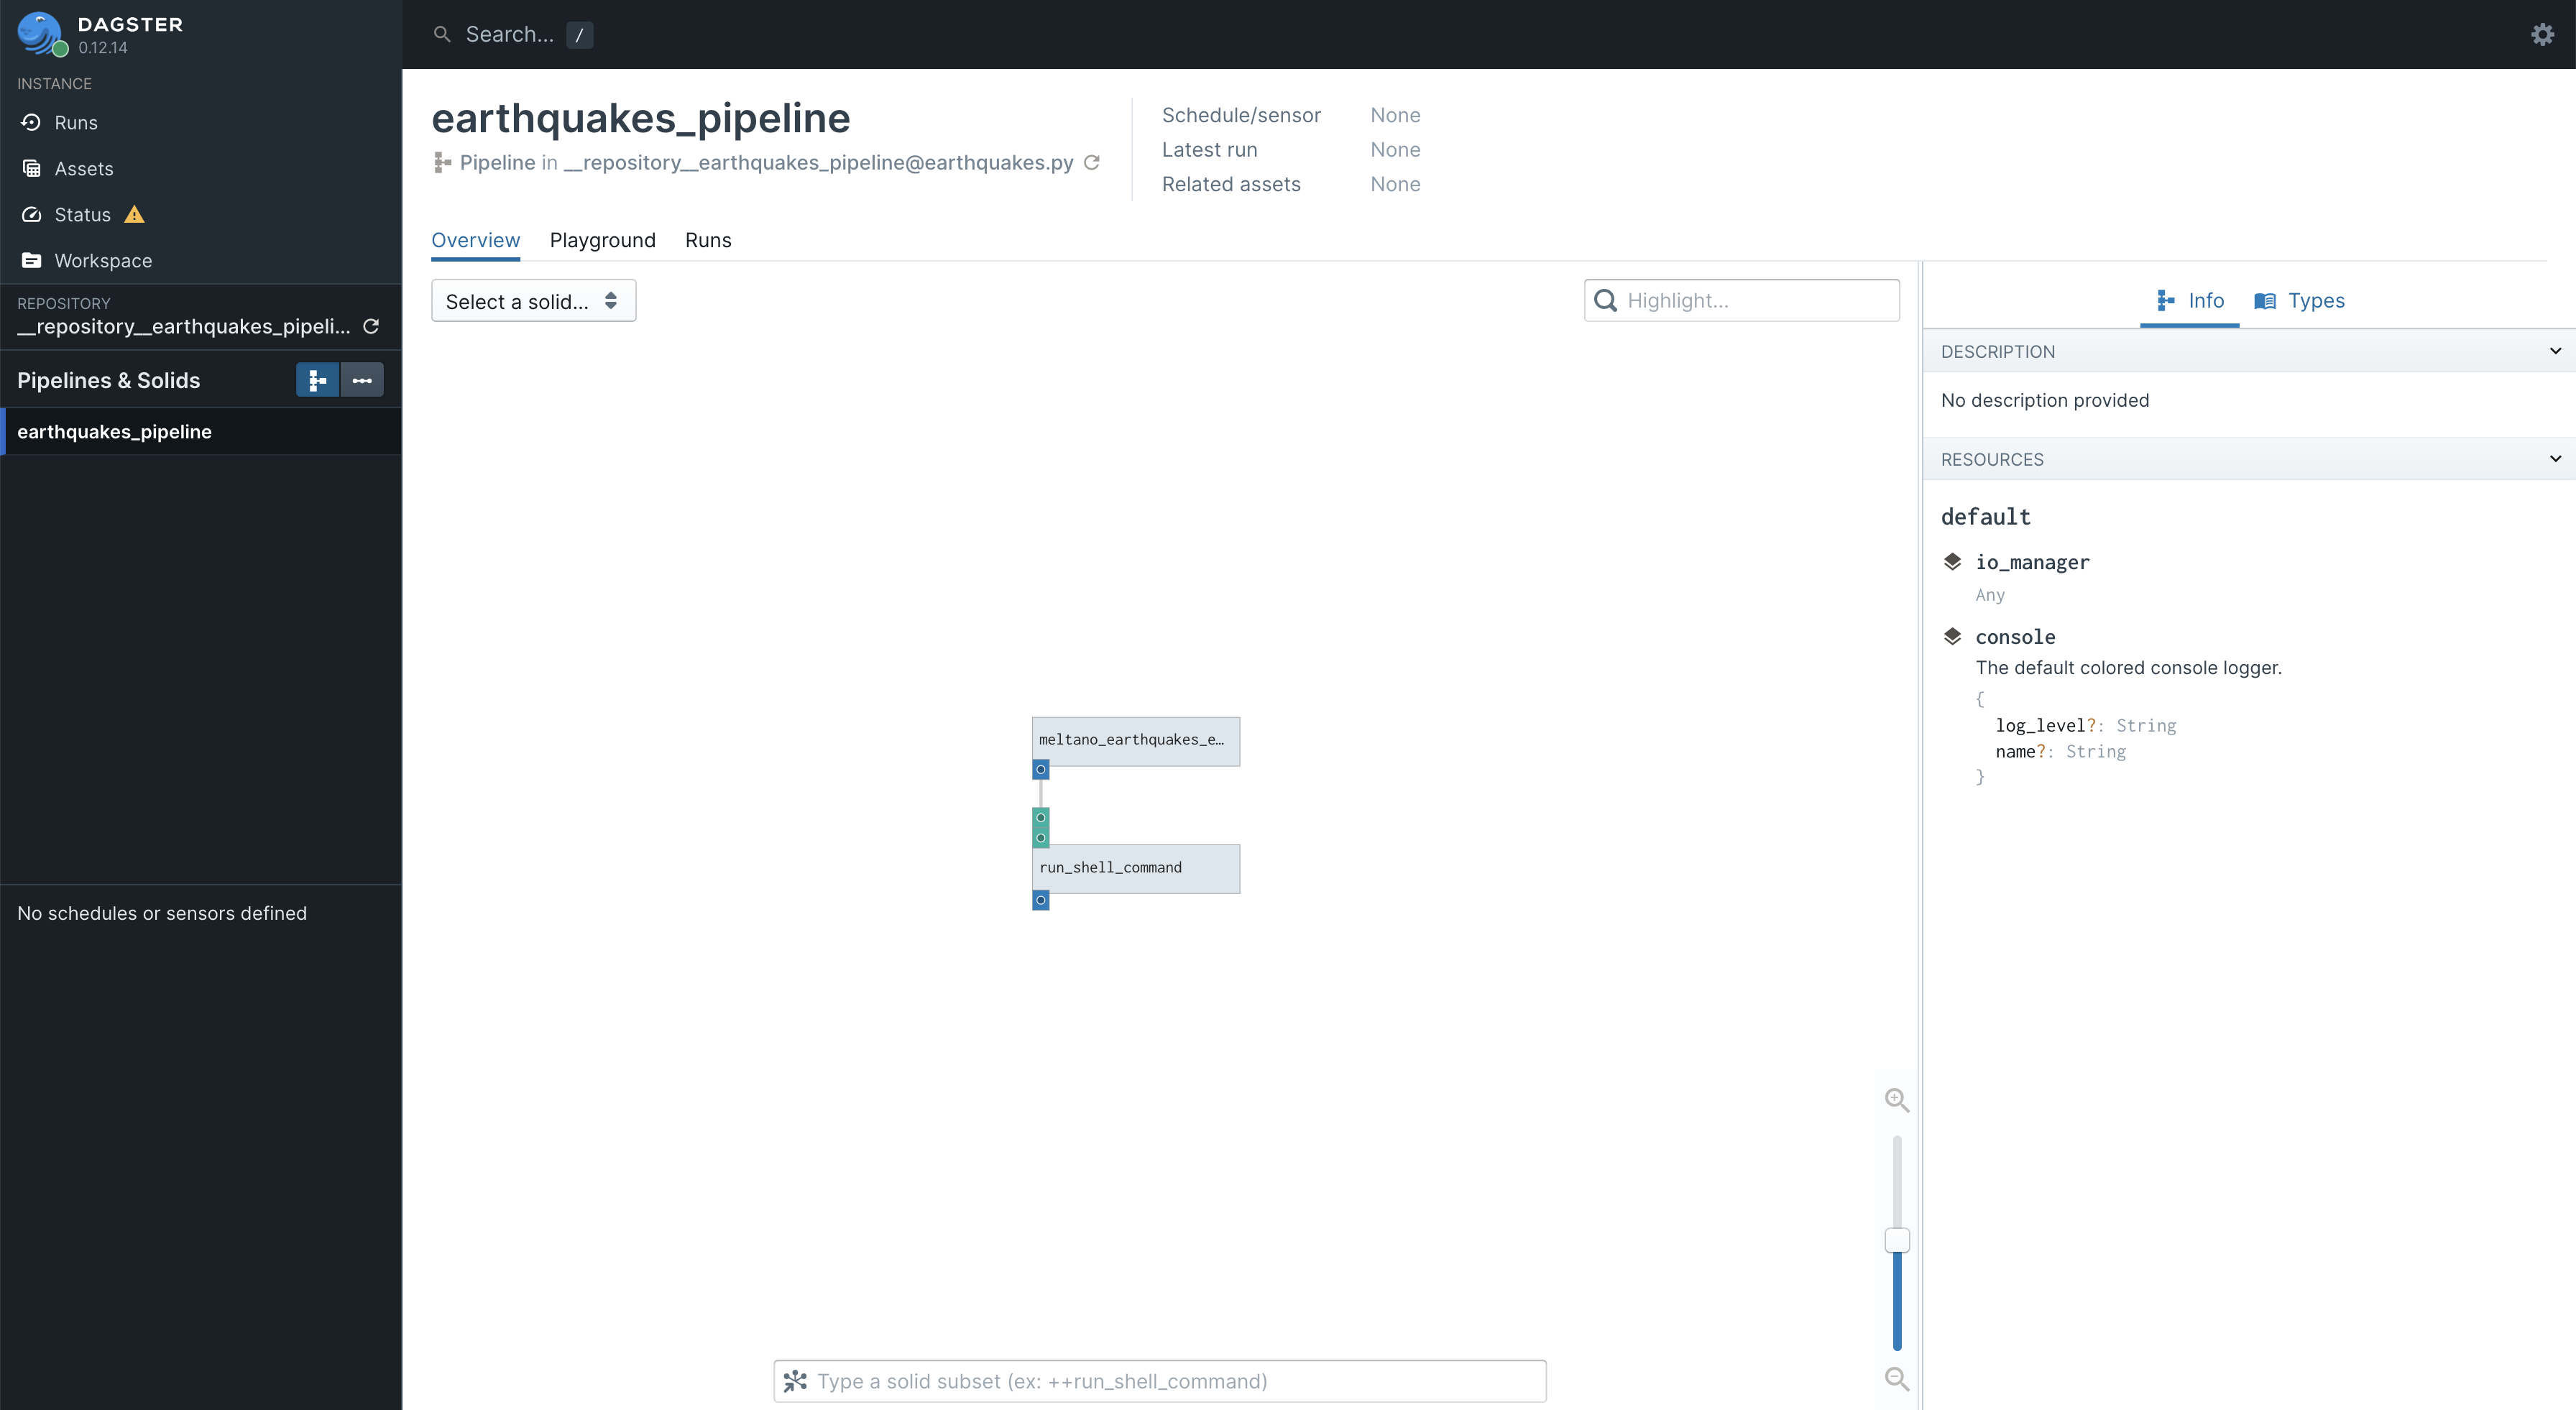
Spend some time poking around, get familiar with this UI because it will be your friend as you develop a fully functioning ELT platform. In the current screen, you can see that earthquakes_pipeline is selected in the left hand panel. In the center, we see our two node DAG. You can zoom in and click on the nodes and get all sorts of info on this screen.
When you are ready to execute the pipeline click the Playground tab a little below the big title of the pipeline. You should see something like this:
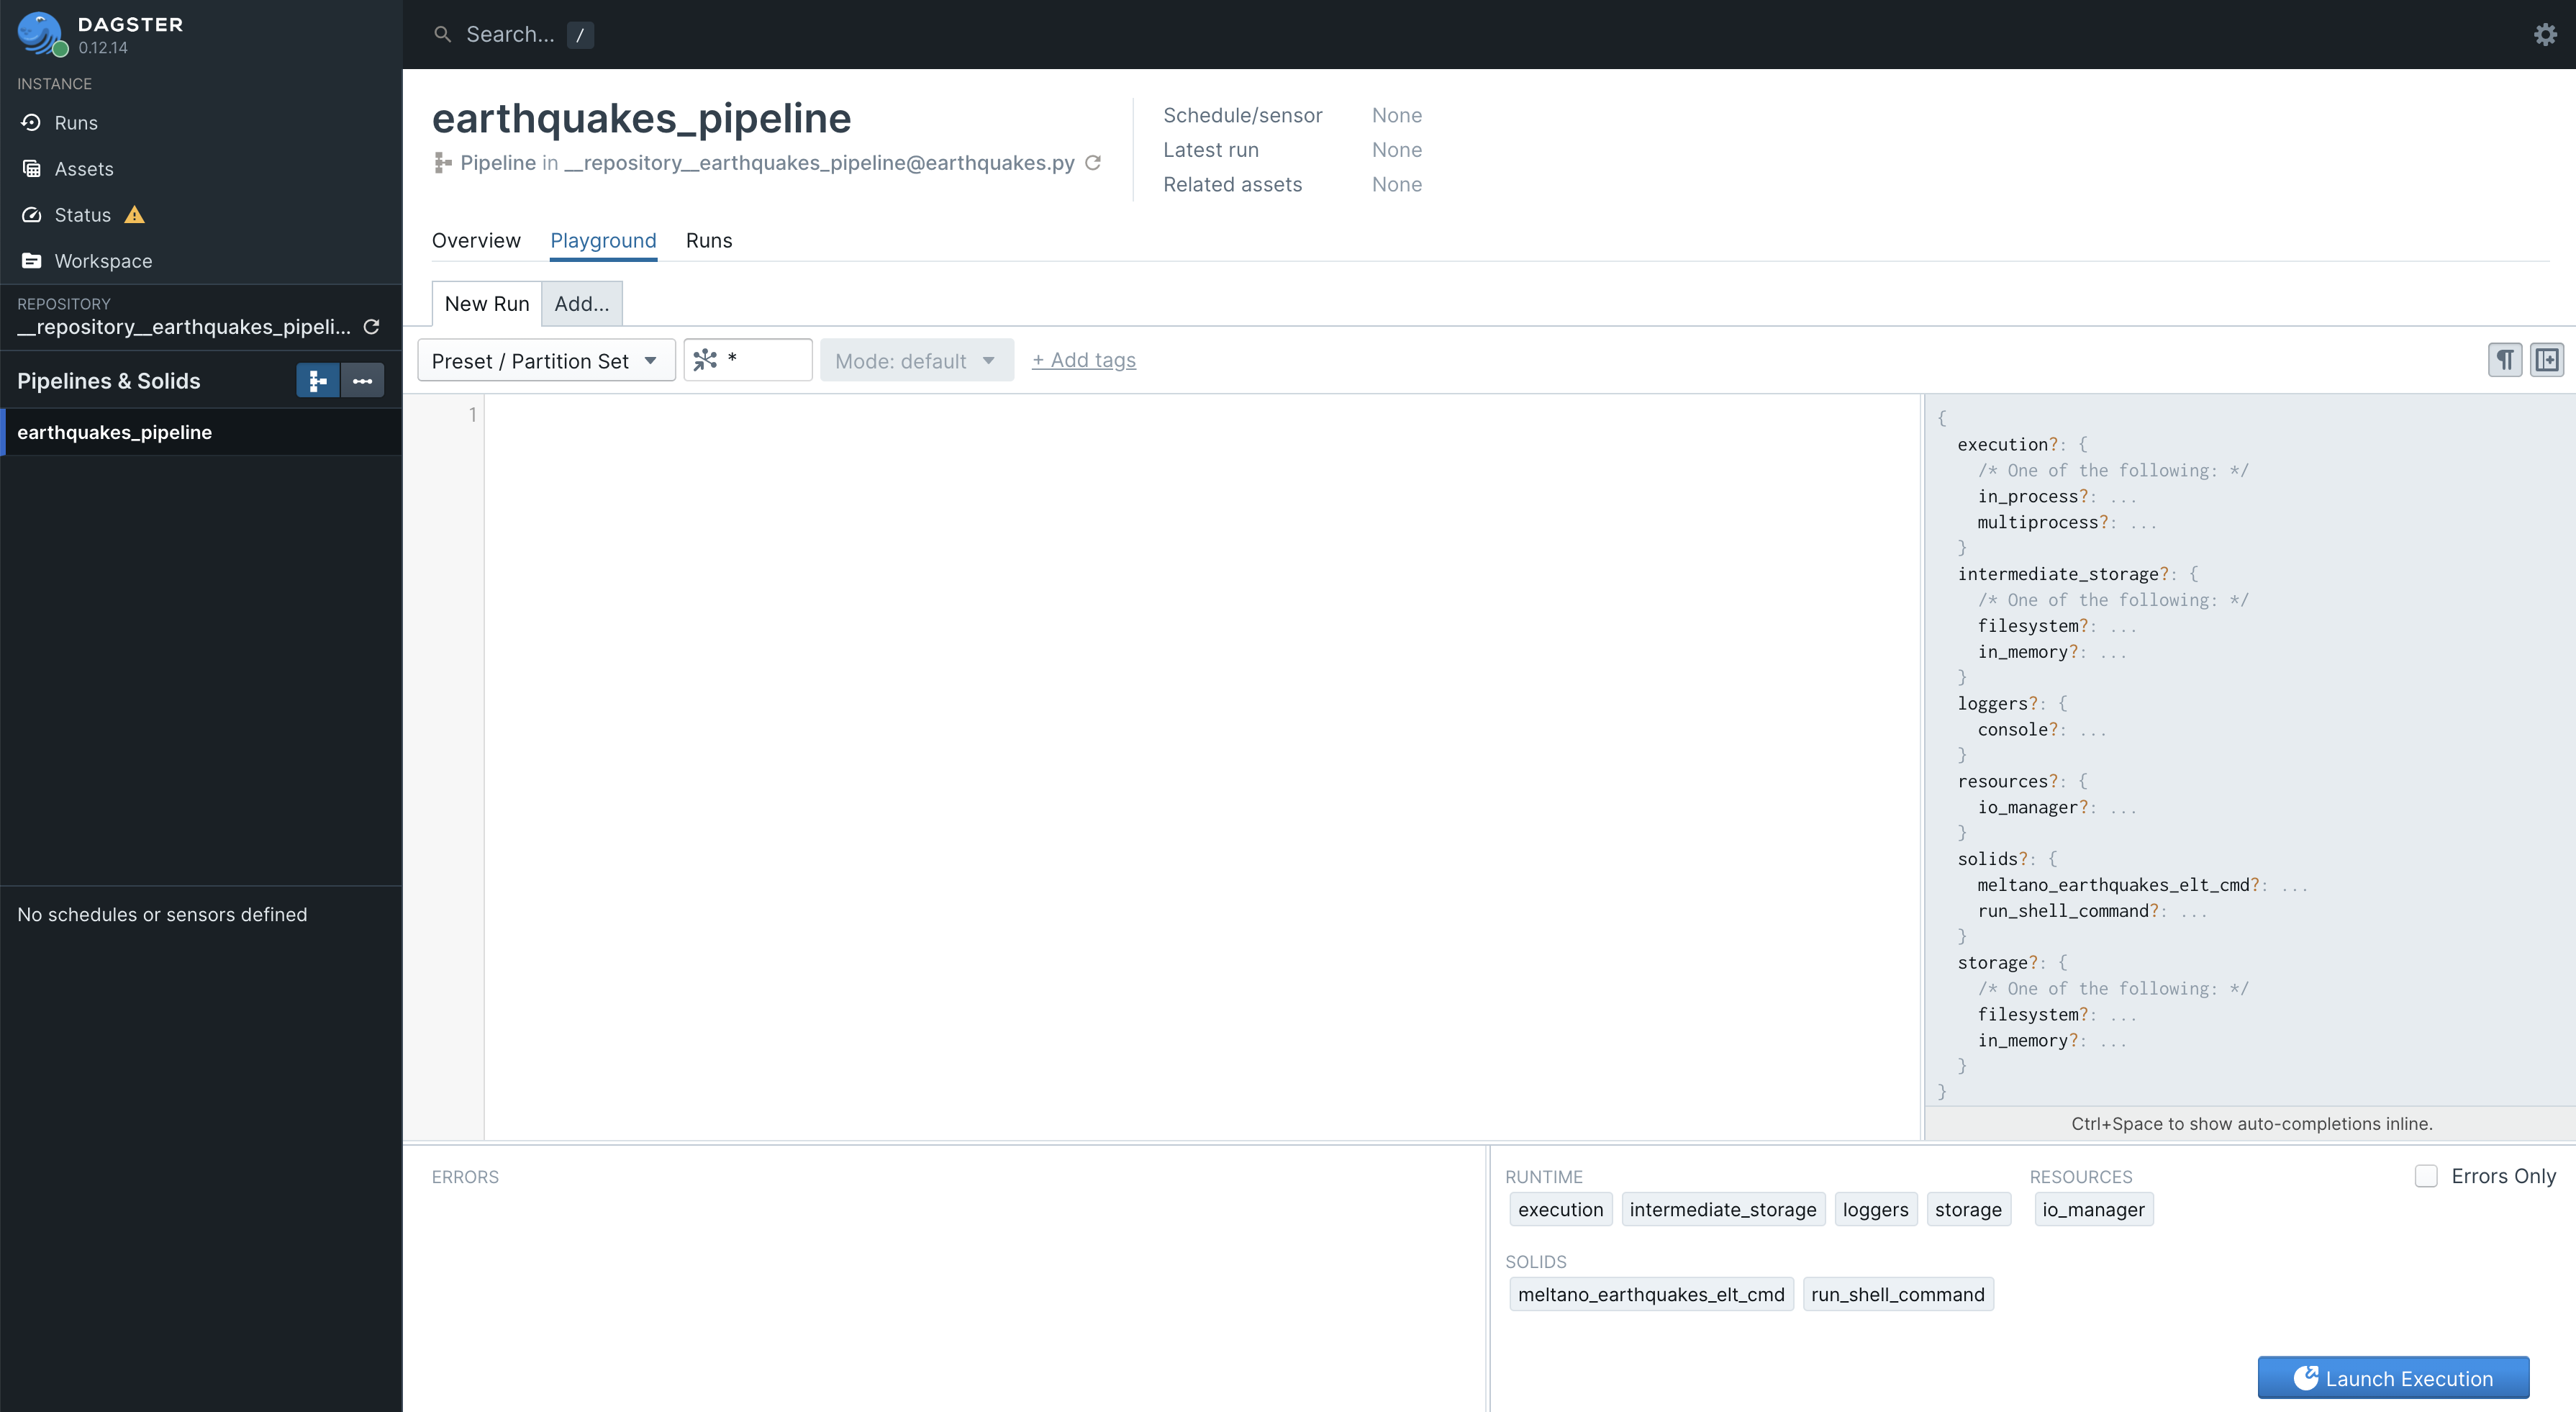
There’s not much going on here. Eventually, you’ll use this to configure each individual execution as needed in testing and production, but we’ll leave that explanation for another time. For now, you can just click the blue “Launch Execution” button in the lower right corner.
This will take you to a new screen that will show you the progress and output of your pipeline. It will start moving suddenly and quickly, and before you know it, it will be done.

And that’s it, you just built and executed your first Dagster/Meltano pipeline. You should notice that you got the same JSON output in the .\meltano\output\ directory that we saw before when running Meltano from the command line. Hit control + c in the terminal when you are ready to kill the dagit UI.
This is the beginning of great things! You can now change this code to match your needs and pull off some pretty sophisticated data tasks. Use the Dagster and Meltano docs as your guide.
As mentioned before, we will follow this post up with updates to this pipeline showing how we found the solution to our multi-tenant problem. Until then, cheers and happy pipelining!